Optimising mobile assets delivery
Ever since I was designing apps and websites professionally, I took delivering design assets as a part of my workflow. It made it easier for my clients who then didn't have to bother with tools like Zeplin that much, and I could make sure everything is as it should be, crisp and taking as much small space as possible.
My assets delivery process was and still is pretty simple. I export all the assets into various resolutions (based on the project). Make a simple folder hierarchy and split all the assets into logical groups. And finally, based on the platform, I run all of these through some compression software (like Image Optim).
Once I am done, I have a library of optimised assets ready for implementation. But recently I've noticed that there are new players on the market, possibly providing better performance than the compression tools I've used so far, and some platforms behave a differently than before so I thought I should revisit my process and upgrade it if possible.
Current state of the industry
- Web uses both bitmaps and vectors for different use cases and supports a wide variety of file formats. What works for me the most is use JPG for photos, SVG for UI or simple illustrations, and PNG for all the other stuff.
- iOS is quite similar with the web, with the exception that iOS does not support SVG natively. It is true Xcode supports PDFs, and it will solve scaling issues, but you shouldn't use them. PDFs are still generated into bitmaps during app build while you have no control over them. So it is better to provide these PNGs yourself and make sure everything is top notch. And as I have discovered, you shouldn't even optimise these assets.
- Android has native support for SVG, but using Android Drawable format for UI is probably the best way to deliver icons and vector graphics on this platform.
But since I still need to optimise PNG assets size, I thought I would give it a test.
What and how did I test them?
WHAT - I tested only macOS apps because I find firing up a browser and then going to a specific URL cumbersome and far too slow for my workflow.
HOW - I took 69 random icons from Material design, generated a huge gradient, and a medium-sized picture full of iPhones, subtle gradients, and shadows. Then I ran all of these through various compression tools and compared the results. I wasn't very scientific about it, but it covered my most common uses cases.
The tools I've tested are:
- Image Optim
- Optimage
- Squash
- Image Compressor plugin for Sketch
Icons
My first test consisted of 69 icons (32x32), exported to 1x, 2x, 3x resolutions making it total 207 png files. The icons have simple shapes filled with solid colors (you can download the whole tested package at the end of the article).
| Compressor | Savings (KB) | Savings (%) | On Disk |
|---|---|---|---|
| Originals | 203 KB | ||
| as SVGs | 73 KB | ||
| 1. Optimage | 100 KB | 49,1% | 103 KB |
| 2. Image Optim | 98 KB | 46,5% | 105 KB |
| 3. Squash | 98 KB | 46,4% | 105 KB |
| 4. Image Compressor | 82 KB | 40,4% | 121 KB |
Icons wise, all the apps compressed the assets approximately the same with a very little difference in size. The processing time was also almost the same.
Gradients as PNGs
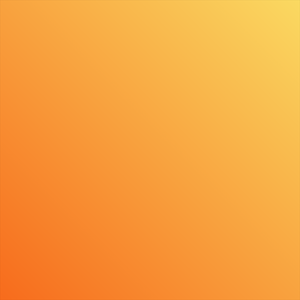
Gradient
For the gradients test, I used picture 2048x2048 pixel big with default Sketch orange gradient running across. Using gradients with PNGs is usually not a good idea because they take too much space (yet provide the best results). So it is better to use JPGs with a little bit of noise (more on this technique a bit later). But I thought this would be a nice test anyways.
| Compressor | Savings (MB) | Savings (%) | On Disk |
|---|---|---|---|
| Originals | 3,65 MB | ||
| as SVG | 4 KB | ||
| 1. Optimage | 2,33 MB | 64,0% | 1,32 MB |
| 2. Squash | 2,33 MB | 64,0% | 1,32 MB |
| 3. Image Optim | 2,15 MB | 58,8% | 1,5 MB |
| 4. Image Compressor | 1,7 MB | 46,57% | 1,95 MB |
Optimage and Squash are the obvious winners. Resulted images didn't lose quality as far as my eyes are concerned. Though one important thing to mention is that Squash and Image Optim took around thrice as much time to process the images. It varied a little bit when I rerun the test, but still, it is a something to consider.
I mentioned earlier that you shouldn't png assets for iOS and Marc Edwards article explains it nicely.
iPhones

For the last test, I choose an image which should be relevant to web development. It is a big image, with solid colors, gradients, and shadows.
| Compressor | Savings (KB) | Savings (%) | On Disk |
|---|---|---|---|
| Originals | 297 KB | ||
| Squash | 238 KB | 80,1% | 59 KB |
| Optimage | 234 KB | 78,9% | 63 KB |
| Image Optim | 233 KB | 78,4% | 64 KB |
| Image Compressor | 233 KB | 78,4% | 64 KB |
All the apps performed very well with this image, the processing time was similar across the competition, and the savings were almost the same too.
Verdict
Every tool has its space on the market.
Image Compressor is a free plugin for Sketch. It is a nice compromise between speed and compression. The benefit here is that you set it once and then you can forget about it. Every image you export from now on will get compressed to some degree.
Image Optim provides similar results as Squash and Optimage. It usually takes a bit more time, but on the other hand is free and has been on the market for the longest time.
Squash ($15) and Optimage ($9) are both paid currently, yet provide the best results.
Squash is a bit more polished, with animations, and sounds, if you are into this kind of thing :)
Optimage, on the other hand, provides more options, works with JPG (while others don't), is sometimes a bit faster, and looks like a standard macOS app.